Pages

Sunday, July 22, 2012

12 Days of Christmas in July: Day 7

Hello,

So my Sunday just flew by.  All this weekend has been the Christmas in July Event on QVC and needless got sucked into it.  I didn't buy anything but I just enjoy seeing all the Christmas things.  It makes me very excited for the holiday season.  Anyways that is the reason that today's post is so late.


For today's card I made a long card that measures 4x9".  I just used a white base and punched the front edge with my Martha Stewart Snowflake Edge Punch.  The thing I love about this punch is that it not only punches but it also embosses a snowflake.  For this card I wanted to use a non-traditional color theme so I used a dark red, navy and silver.  The "seasons greetings" cut is from the Celebrate with Flourish Lite cartridge.  It is cut at 3.5".  I added a 1/4x9" strip of navy cardstock above the punched snowflakes.
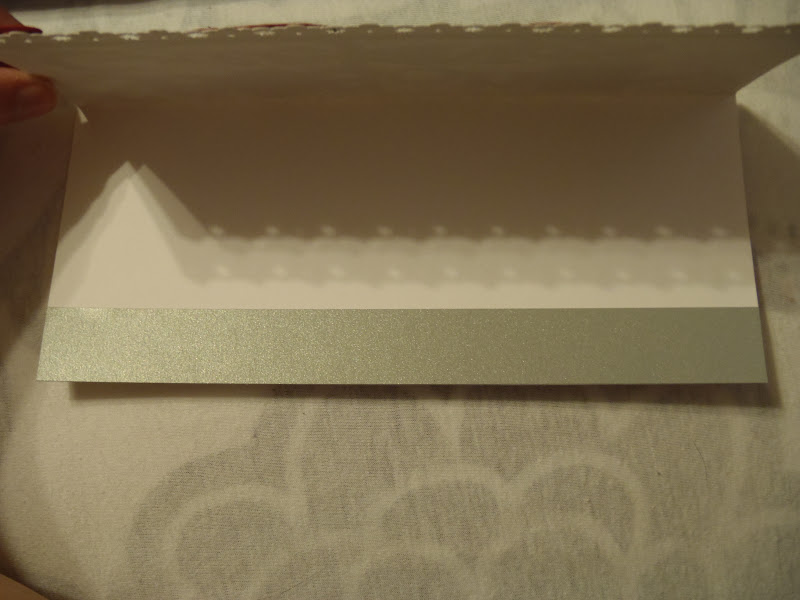

To help the punched snowflakes stand out I added a 1x9" strip of silver cardstock on the bottom edge of the inside of my card.  This was a very simple and elegant card.  This size card will fit in a No. 10 size envelope. 

Instructions:
White Cardstock Base: 8x9" (folded in half to make a 4x9" card)
Seasons Greetings Cut: 3.5"
Navy Strip: 1/4x9"
Silver Strip: 1x9"
Martha Stewart Snowflake Embossed Edge Punch

I hope you enjoyed tonight's post.  I only have 5 more projects to show you before my 12 Days of Christmas in July 2012 series in finished.

Have a Magical Day!!
Jessica

Saturday, July 21, 2012

12 Days of Christmas in July: Day 6

Hello,

Here we are for Day 6 of my 12 Days of Christmas in July 2012 series.  I made 3 little signs that are hung together. 


They are simple and small but just right.  I used 3 different cartridges to make today's project.  They were Cricut Essentials which is one of the four cartridges installed on my Cricut Expression 2 machine, Lite Cherry Limeade and Simply Charmed.  The base for the signs were cut at 3.25" and from pages 26 & 27.  I chose to use the red polka dot paper as the frames.  The 2 signs I cut for the Santas were turned on the sides in order to make the Santas fit within the frame. 


I cut the Santas at 3" each with a black shadow from Simply Charmed.  I added 2 red jewels on the bottom of the signs to match the larger jewel on the "Believe" sign.  The Santas are popped up with pop dots to add some dimension.


I cut the letters for this sign from Lite Cherry Limeade at 1.5" and the whole word fit perfectly in the white section of this sign.  I added a large red jewel on the dot for the "i".

For each of the signs I punched 2 small holes in the corners and strung 1/8" black satin ribbon in order to hang them.  I debated hanging them all on one string but I liked the individual hangers better.


Instructions:
Signs (pg. 26 &27): 3.25"
Letters: 1.5"
Santas (p. 64): 3"
Red Jewels (2 sizes)
1/8" Black Satin Ribbon

Hope you enjoyed today's project.  I'm half way done with this series and I can't believe how fast it is going.  Come back tomorrow for another project.

Have a Magical Day!!
Jessica

Friday, July 20, 2012

12 Days of Christmas in July: Day 5

Hello,

I'm back today with another Christmas scrapbooking layout.  I had a lot of fun making the layout yesterday so I decided I wanted to make another one.


This was another simple layout.  I just used a white 12x12" cardstock as my base.  The 2 larger photo mats are 4.5x6.5" each and the smaller one is 4x4".  I just used red cardstock to make the mats.  The images I cut are both from the 3 Birds on Parade cartridge.  The are both from page 43 of the handbook.  I cut the Santa Bird at 4" with the shadow in black.  The phrase is cut at 3" with the black shadow.  I wanted my images to really stand out so that's why I did the black shadows.  After I glued everything down I decided my plain white cardstock needed something extra so I stamped some red candy canes around the page. It turned out super cute and my mom said that she thought the paper was printed like that...but she obviously wasn't looking at the middle of the page because that isn't stamped at all.


Here's my Santa Bird.  I added some clear Studio G glitter glue on the beard and hat.  I also added 2 little black dots on the beak for the nostrils.


For the phrase I cut out the first layer in white and the accent pieces in red.  On the little hat I added more clear glitter glue where the fur part of the hat would be.  The pieces overlapping the photo mats are not glued down so when I put my photos on this page they'll slide right underneath.


I added pop dots under the phrase and image in order to give my page some dimension.  This page turned out to be super simple and cute.


Instructions:
White Cardstock Base: 12x12"
Red Cardstock Photo Mats: 2-4.5x6.5; 1-4x4"
Santa Bird (p.43): 4"
"Be Jolly" Phrase (p.43): 3"
Studio G Candy Cane Stamp & Red Ink
Clear Studio G Glitter G
Pop Dots

Hope you enjoyed today's 12 Days of Christmas in July 2012 series.  Make sure to stop back tomorrow for another project.

Have a Magical Day!!
Jessica

Thursday, July 19, 2012

12 Days of Christmas in July: Day 4

Hello,

I decided to switch it up today and make a Christmas scrapbooking layout.  I wanted to make something fun and simple.  I think my favorite part of Christmas is the decorating part so I thought it would be appropriate to make a "Deck the Halls" layout.


This layout turned out to be super cute and it was super simple to make.  I used the 3 Birds on Parade cartridge for this layout.  This cartridge was one of the first that I bought because it has a bunch of adorable images that represent lots of holidays/events.  When I came across this cute birdie and the phrase "Deck the Halls" I knew they would make a great layout. 

I used dark gray 12x12" cardstock for my background.  I chose to have 2 photo mats each cut at 4.5x6.5" (white layer).  Then I added another layer of green cardstock each cut at 4.75x6.75".  I used light green for the vertical mat and regular green for the horizontal mat.  On the bottom I added a red mat with a white section for journaling.  I used 1/4" wide red satin ribbon to accent my photo mats.  The ribbon is attached using the cheater method so I can later slide my photos behind it to attach them to the mats.

Below I have some close-up pictures of the details.  I have also included the measurements of my cuts.


I loved the "Deck the Halls" phrase so I knw I needed to use it.  This is cut at 3".  After I had attached everything to my base I decided that it needed a little something more so I added the 3 strings of lights.  I just cut the black to fit where I wanted them and cut out just the lights from p. 44.  I cut them at 5.5" with the Real Dial Size Off.  I cut 3 sets of the lights one in red, one in light green and the last in regular green.  I think it added just what was needed to my page.


I couldn't make this page without using the birdie from p. 44.  He is cut at 4.25" with the white shadow.  I actually glued the shadow down on the page and popped up the birdie with pop dots.  I've seen this done before and really liked the look of it.  To add some fun to the page I used red, light green and green Studio G glitter glue on all the Christmas lights.  I used Glossy Accents on the beak and legs of my birdie.  Before adding the Glossy Accents I drew 2 little black dots on the beak.

Instructions:
Dark Gray Base: 12x12"
Light Green & Green Photo Mat: 4.75x6.75"
White Photo Mats: 4.5x6.5"
Red Satin Ribbon: 1/4x7" & 1/4"x5"
Birdie (p.44): 4.25"
Deck the Halls Phrase: 3"
Red Journaling Mat: 1.75x7" (then cut the chevron out of one side)
White Journaling Mat: 1.5x3.75"
Extra Christmas Lights: 5.5"

Hope you enjoyed Day 4 of my 12 Days of Christmas in July 2012 series.  Come back tomorrow for another Christmas project.

Have a Magical Day!!
Jessica

Wednesday, July 18, 2012

12 Days of Christmas in July: Day 3

Hello,

I'm back again with some super cute A1 sized cards.  I absolutely love the Lite Celebrate with Flourish cartridge so it was no surprise that I would definitely be making some cute cards.  There are 5 different Christmas images and today I used 3 of them to make some coordinated A1 cards.


I am a big fan of polka dots and the red and green polka dot paper I got from Michael's just seemed to fit my idea for these cards.  Plus I had solid paper that matched them.  I cut the polka dot paper at 7x5" and folded them in half then added the 1x5" paper as an accent.  The opposite side of the polka dot paper is white so it will work perfectly for writing a message.


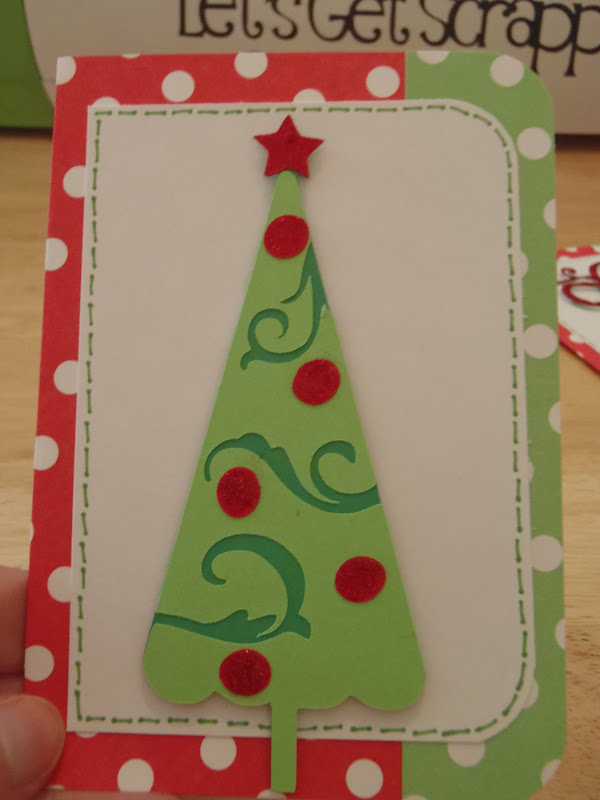
This is the first card of my set.  I chose the tree and cut it at 4.5".  I decided to do the same colors of paper as the example on the handbook which is what I did for each of the images.  For this card and the one with the ornament I used my Spring Green Zig Writer to do some faux stitching.  I wanted to add some flare to all of my images so I covered all the red pieces with red Studio G glitter glue.


I think the poinsettia cut is my favorite of the 3 images I cut.  I cut it at 2.75" and I used the Rose Zig Writer for faux stitching on this card.  I used pop dots to pop up all of my images since these cards were super simple.


My last image was the ornament which was cut at 3.5".  I rounded 2 corners on each of my cards using the 1/2" size.  Below I included my sizes for making these 3 cute cards.

Polka Dot Cardstock: 3.5x5" (done 3 times; 2 in red, 1 in green)
White Layer: 4.25x3" (done 3 times)
Polka Dot Layer: 1x5" (done 3 times; 1 in red, 2 in green)
Christmas Tree Image: 4.5"
Poinsettia Image: 2.75"
Ornament: 3.5"

Hope you enjoyed today's set of mini cards.  Come back tomorrow for another project for my 12 Days of Christmas in July 2012 series.

Have a Magical Day!!
Jessica

Tuesday, July 17, 2012

12 Days of Christmas in July: Day 2

Hello,

I'm here again to bring you another Christmas card.


I love the colors I chose for this card.  The base of my card is Kraft cardstock.  I got the olive green cardstock with glitter dots in the clearance bin at Michael's.  The shimmery eggplant cardstock is also from Michael's.  I love how well these colors go together and the non-traditional Christmas look. 

Earlier this year I got the Trim the Tree Seasonal cartridge and I just couldn't wait to cut something.  I love the detail of the cuts.  After looking at the images I knew I really wanted to cut the reindeer.  I absolutely adore the antlers.  I cut my image at 3.5" and I would not suggest cutting it any smaller.  The intricate detail makes it harder to peal off the mat.

My sentiment is a Studio G stamp and I used a Studio G eggplant colored ink.


Here's a close up of the reindeer.  Below are my measurements for this card.

Kraft Cardstock Base: A2 (4.25x5.5")
Olive Green Glitter Cardstock Layer: 4x5.25"
Eggplant Cardstock Layer: 3.75x5"
Tan Layer: 3.75x1.5"
Reindeer Image: 3.5"

Hope you enjoyed today's card for my 12 Days of Christmas in July 2012 series.  Come back tomorrow for some super cute mini cards.

Have a magical day!!
Jessica

Monday, July 16, 2012

12 Days of Christmas in July: Day 1

Hello,

I decided to start some series of posts in order to keep me from slacking on my blog.  I really want to post more often and thought this would help me get into posting more regularly.  Christmas is one of my favorite times of year so I thought the 12 Days of Christmas in July would be a great first series for me to do.  Starting today I'll post a Christmas themed card or layout. 

For today I made a couple mini 3x3" cards.  I used Studio G stamps that I got on sale.  They turned out to be way cuter than I thought they would be. 


 Aren't they adorable?


I decided to show you the mini stamp sets I used from Studio G.  I found these sets in the Dollar bins at Michael's and Joann's. 


Here's a close-up of the little elves and here's how I made this mini card:

Red Base: 3x6" (folded in half to make a 3x3" card)
Green Polka Dot Layer: 2.75x2.75"
White Layer: 2.5x2.5"
Green Polka Dot Strip: 2.5x0.5"

I rounded the corners with my Corner Chomper (1/4").  I colored in the elves using Zig Writers (Rose, Spring Green, & Pure Pink), a brown Pilot G-2 pen and I used a gold gel pen for the little buttons on their jumpers.  I also added some clear Studio G glitter glue on the pom poms of their hats.


Here's a close-up of the little penguin and here's how I made this mini card:

Silver Base: 3x6" (folded in half to make a 3x3" card)
Light Blue Layer: 2.75x2.75"
Red Layer: 2.75x0.75"

I also rounded the corners on this card as well.  I colored the penguin with a black Pilot G-2 pen and Zig Writers (Rose & Pure Orange).  I added some sparkle to the penguin's santa hat using the clear Studio G glitter glue.  I used the snowflake stamps in this set to do emboss the blue layer.  I just used white embossing powder to make my white snowflakes.  I used clear embossing over black ink for my sentiment on the red paper.  I also popped up my penguin with pop dots.

I hope you enjoyed Day 1 of my 12 Days of Christmas in July 2012 series.  Come back tomorrow for another great Christmas card.

Have a magical day!!
Jessica